Showing posts with label apache. Show all posts

A Step-by-Step Guide to Fixing the 'PHP Extension GD Disabled' Error in Drupal on XAMPP

Drupal is a popular content management system that is built on PHP. It requires several PHP extensions to be enabled in order to function properly. One such extension is the GD library, which is used for image manipulation. However, sometimes the GD extension may be disabled, resulting in errors when working with images in Drupal. In this blog post, we will discuss how to fix the "php extension gd disabled" error in Drupal on XAMPP.

Step-by-Step Guide:

Follow these steps to enable the GD extension in XAMPP and fix the error:
1.    Locate your PHP configuration file: The first step is to locate the php.ini file in your          XAMPP installation. You can find this file in the "xampp/php" directory.
2.    Enable the GD extension: Once you have located the php.ini file, open it in a text editor          and search for the following line:

   ;extension=gd


This line contains the GD extension, but it is currently commented out with a semicolon. Remove the semicolon at the beginning of the line to enable the extension, like this:

    extension=gd

3.    Save the changes: After enabling the GD extension, save the modified php.ini file.
4.    Restart Apache: To apply the changes, you need to restart the Apache web server in                XAMPP. You can do this from the XAMPP control panel or by using the command line.
5.    Verify that the extension is enabled: Create a PHP file with the following contents:

    <?php
    phpinfo();
    ?>

Save the file in the "htdocs" directory in your XAMPP installation and name it "phpinfo.php". Now load this file in your web browser by navigating to http://localhost/phpinfo.php. Search for the GD extension in the output to verify that it is enabled.

Conclusion:

Enabling the GD extension in XAMPP is a simple process that can be done by modifying the php.ini file and restarting the Apache web server. By following the steps outlined in this blog post, you should be able to fix the "php extension gd disabled" error in Drupal and use the GD library for image manipulation. It is important to note that the specific steps may vary depending on your hosting environment, so always refer to the documentation or seek assistance from a technical support team if you encounter any issues.

How to Install & Run CodeIgniter

How to install codeigniter by following some steps are explained below:
1. Download the zip file from this Url https://github.com/bcit-ci/CodeIgniter/archive/3.1.9.zip.
2. Unzip the files and put them to your webserver 'htdocs folder' where you want to. lets assume that you put it at codeigniter folder of your web server.
3. Open the application/config/config.php file with a text editor and set your base URL. lets asumme that your base URL is set like this:
$config[‘base_url’] = “http://localhost/codeigniter/projectName";
4. If you intend to use a database, open the application/config/database.php file with a text editor and set your database settings. Set the following variables according to your setup.
$db[‘default’][‘hostname’] = “localhost”;
$db[‘default’][‘username’] = “admin”;
$db[‘default’][‘password’] = “*****”;
$db[‘default’][‘database’] = “projectone”;
$db[‘default’][‘dbdriver’] = “mysql”;
$db[‘default’][‘dbprefix’] = “”;
$db[‘default’][‘active_r’] = TRUE;
$db[‘default’][‘pconnect’] = TRUE;
$db[‘default’][‘db_debug’] = TRUE;
$db[‘default’][‘cache_on’] = FALSE;
$db[‘default’][‘cachedir’] = “”;
5. Now you can run installed codeigniter software by following below urls
Kindly note in below url codeigniter is your project folder name. so, when you are going to run than check once that if your project folder name is codeigniter than you can follo below link else you can change your url as per your project folder name.
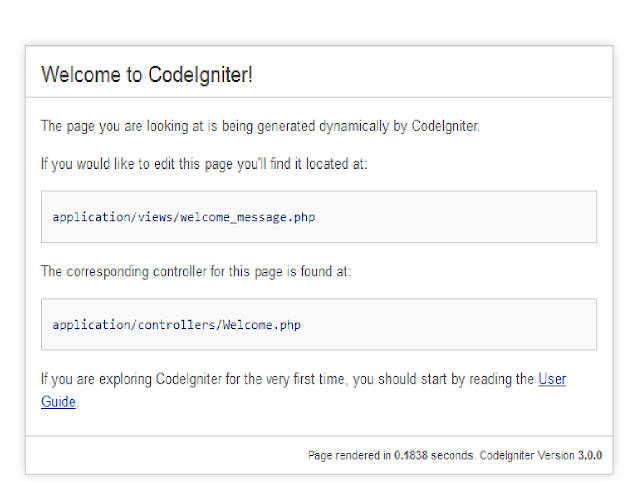
After run of your project in browser you will see this output
“Welcome to Code Igniter!”
codeigniter
Now you are ready to work with Code Igniter.